As you may know, Google’s Gmail is the most popular, and arguably best featured, free email service available. One of the challenges that I’ve encountered with it however is its default text-only email signature when composing emails via the Web.
The Best Solution
For Gmail users who would like to utilize graphic/html email signatures, the best solution is to link your Gmail account to a POP client  (like Outlook or Entourage). You can then install a custom designed html email signature. If you’re a client of ours the instructions for installing the custom email signature in Outlook or Entourage are posted in our FAQs.
This means of course that to have your custom HTML email signature inserted in outgoing messages, you’ll need to compose those messages using Outlook or Entourage.
If you would still like to use the Web based Gmail as your primary email platform, simply click on “Settings” in your Web Gmail account (in the upper right hand corner), then choose the “Forwarding and POP/IMAP” tab, and select “Enable POP for mail that arrives from now on” then on the next option select “keep Gmail’s copy in the Inbox”. Make sure and hit the “Save Changes” button when you’re done.
Now all your incoming and sent email (including that you send from Outlook) are accessible on your Gmail Web account. You won’t have to worry about going back and forth from Outlook to the Web to find old emails, they’ll all be on the Web.
Custom Email Signatures When Only Using Web Based Gmail
There are a few existing solutions for achieving this, the best probably being the Better Gmail Firefox extension . The downside here is that this only works with Firefox and with the “older version” of Web based Gmail. The newer Better Gmail 2 Firefox extension for the newest Gmail version (as of 1/9/08) does not seem to offer the email signature feature of its predecessor.
The other existing option is to drag-and-drop/cut-and-paste a section from another open HTML file displaying the formatted text and images of your email signature into the compose window of your Gmail account as described in this post at Digital Inspiration .
Using the Google Tool Bar to Send HTML Emails or to Insert HTML Email
Signatures
A third option that I don’t think is documented on Web anywhere is to utilize the Google Tool Bar’s “Send to” button to send HTML formatting/graphics via Web based Gmail.
Note: I’ve tested this for Firefox on Windows XP and IE7 on Windows Vista. I does not work for me using Firefox on Windows Vista.
Here are the steps:
- Download and install the Google Toolbar by visiting: http://toolbar.google.com/
- Close and restart your Web browser.
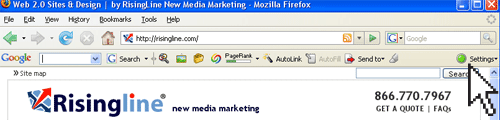
- In Firefox go to “View”, “Toolbars” and make sure there is a checkmark next to “Google Toolbar”. If using IE7 go to “Tools”, “Toolbars” and insure there is a checkmark next to “Google”. You should then see the Google toolbar in your browser, similar to the screen-shot below. Then on the toolbar, go to “Settings”, “Options”, “More” and make sure there is a checkmark by the “Send to” button.
- The HTML file you want to include in your outgoing Gmail message will need to be uploaded to a Web server. If you plan on adding the same HTML to outgoing messages on a regular basis (such as is the case with a HTML email signature) just book mark that URL.
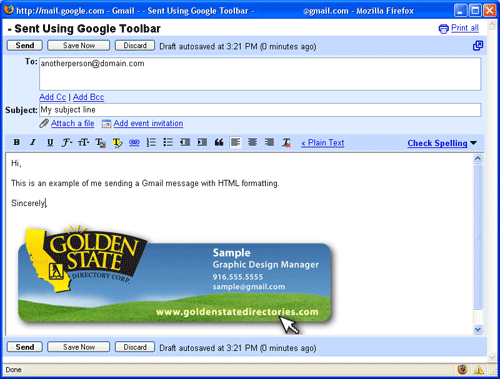
- To send a Web based Gmail message with the HTML formatting, open the bookmarked URL (e.g. http://risingline.com/sample.html) then click the “Send to” button on your Google Toolbar and select “Gmail” from the drop down menu. You should see the HTML formatted page, simply type you message above that and hit the “Send” button.
Additional Notes:
If you’re a user sending a HTML page or email signature that was already developed for you, ignore the below.
When coding the HTML page to be sent. Make sure the path to graphics are absolute, insert a non-breaking space in the title tag (otherwise a hyperlink of the page title will appear above the HTML), and add alternate text to images for those email clients that block graphics. Here’s the code used in the above example:


